

I think I’m finally turning the corner.
After months of planning the basement retrofit, people are finally showing up, and the project is starting to look like something finished, or at least finish-able. My friend and architect Derk first dreamed up the floor. His enthusiasm is contagious, but it isn’t budget-conscious. The floor went through several design versions before ending up where it probably should have started: something you can walk on, sweep, even rest on. Now it has in-floor heating, with insulation and a vapor barrier underneath.
But so far, the real prize in this retrofit story is the walls.
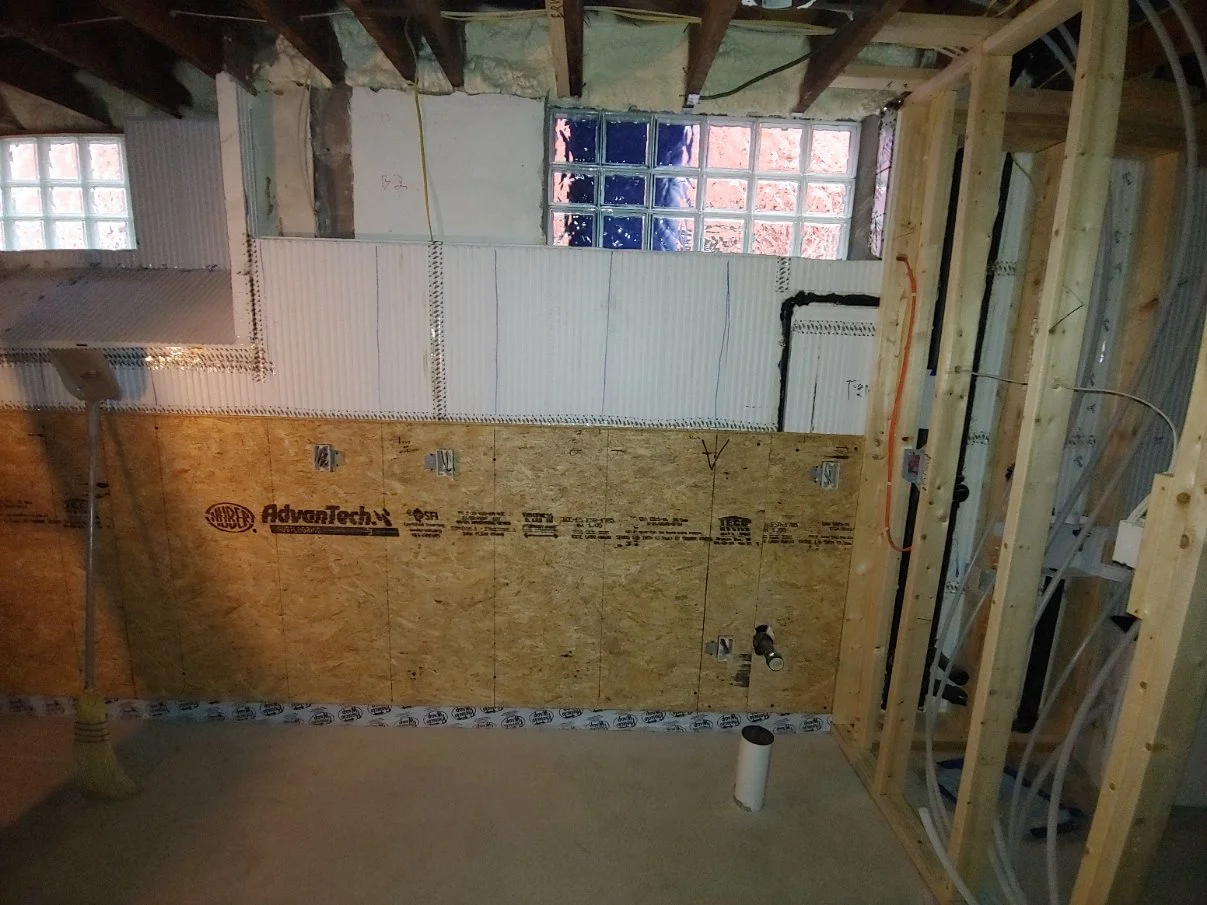
Why the walls
Concrete block makes a sturdy foundation, but it’s a poor insulator. For energy efficiency, insulating the basement walls was one of the biggest moves available to me. In Minnesota, a 2017 NREL fact sheet ranked R-10 basement wall insulation first among the state’s top ten improvements for statewide annual bill-savings potential, with a modeled average of $268 per household per year. That’s a statewide research finding, not a guarantee for my basement or yours. Still, it’s a good reason to take the walls seriously.1
So the real question was this: how do you insulate basement walls without inviting moisture, and everything that comes with it?
Enter InSoFast.
Why I chose InSoFast
As a retrofit solution, it’s especially appealing. You need fairly clear walls to start, but beyond that, it answers a lot of the concerns a homeowner has about insulating a basement, and that’s a long list.
The panels are expanded polystyrene (EPS). They’re lightweight and click together in a satisfying way. Think adult jigsaw puzzle meets building science. Each panel is 2.5 inches thick and rated at about R-10.5, with built-in plastic stud strips and channels for wiring.2 What I like most is that they make a continuous layer: top to bottom, side to side, corner to corner. Continuity doesn’t raise the rated R-value. It helps reduce the gaps and thermal bridges that can interrupt a wall’s insulating layer.
“Are you doing this work yourself?” people ask. I’m tempted to say yes, given the hours I’ve spent planning every step, drafting scopes for contractors, and waking up at 5 a.m. to ask AI about my latest worry. Fortunately, I have an A+ general contractor helping me.
My goal is about a 50% cut in carbon emissions, and the planning estimates suggest I’m getting close. More importantly, the core systems of wiring, heating, and insulation are being brought up to modern standards, as outlined in Green Home Club’s homeowner retrofit course. That isn’t easy to do in any old home. Things have to be done in the right order.
The questions I kept asking
“Are we sealing the tops?” I asked Better Builds Minnesota, my general contractor, about the InSoFast panels.
“Yes,” they replied.
“What about the bottoms?”
Yes to that as well.
“Sealing the seams?”
It turns out the manufacturer’s instructions have an answer. InSoFast calls for sealing the floor joint, the top of the wall, gaps, corners, penetrations, and openings. However, it says not every intact interlocking seam needs to be sealed. The panels fit together that well, but the lesson is to follow the product’s details and not assume either way.4
I also told Keith, the lead carpenter at Better Builds, that I was worried about the panels’ durability. He came up with the idea of adding subfloor panels to the lower wall.
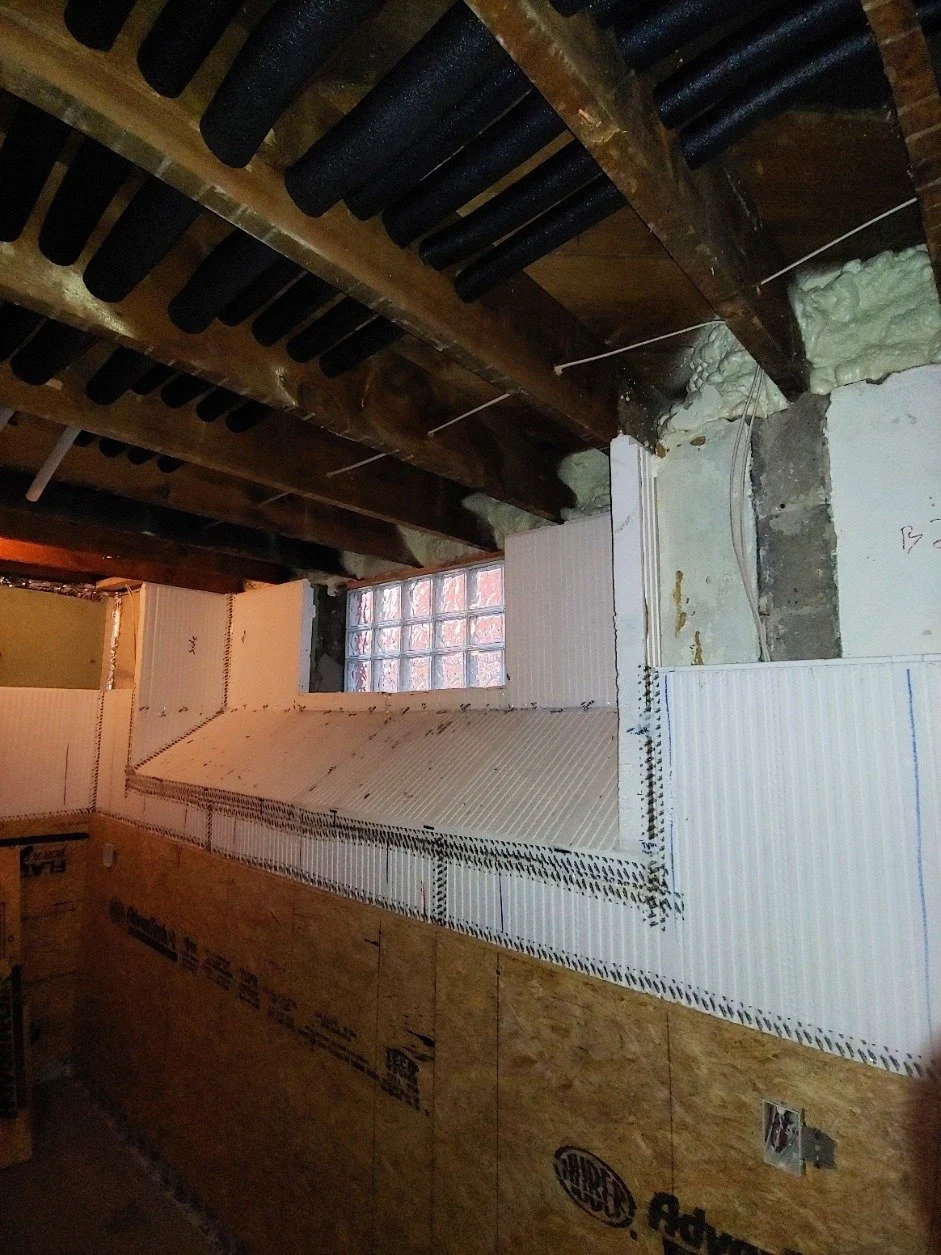
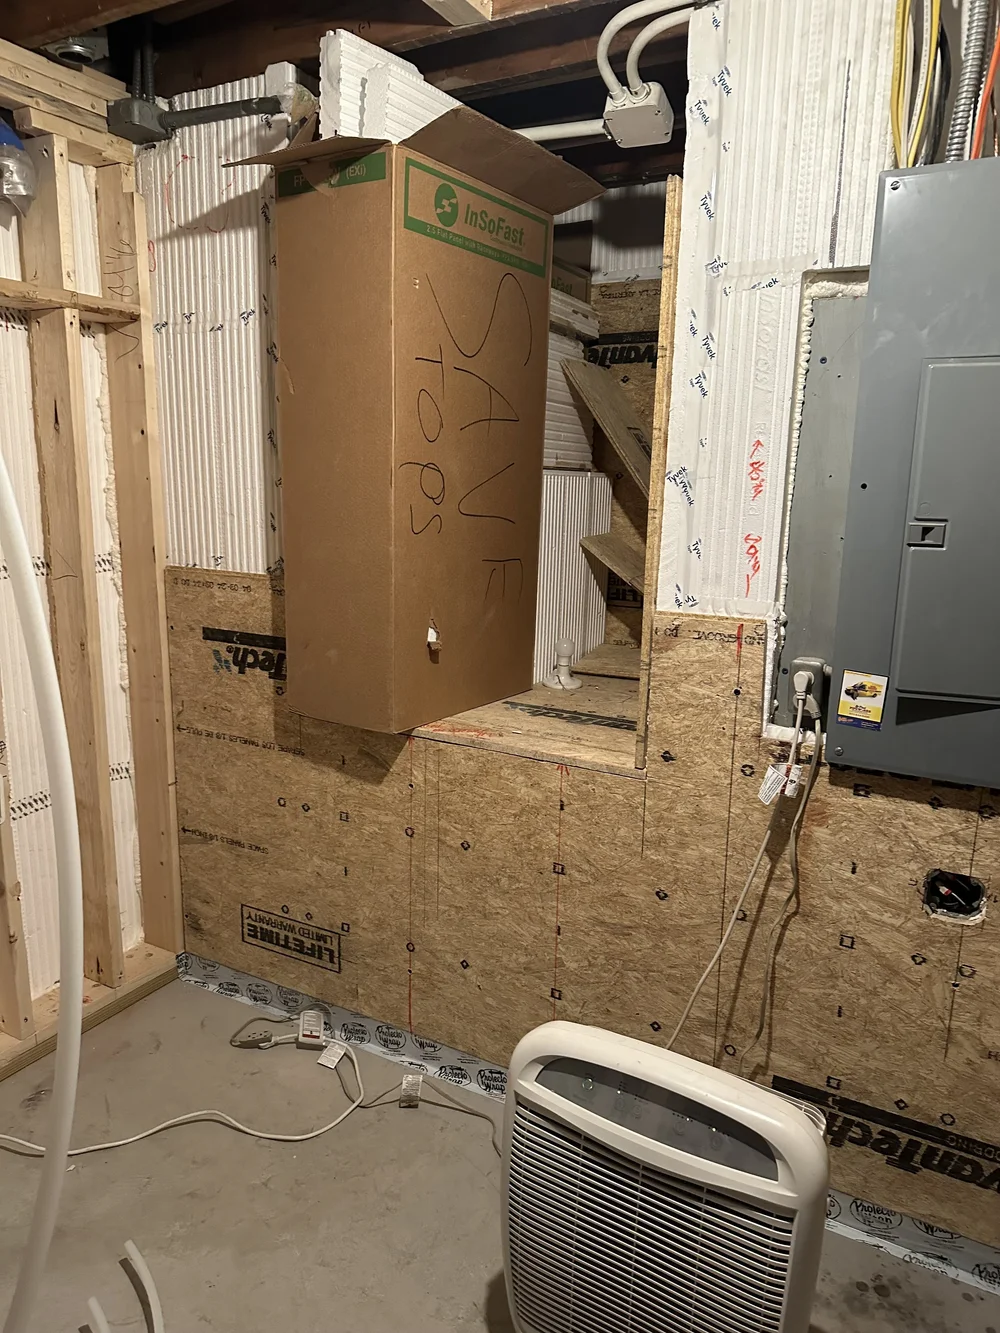
What we’ve got now
- Base layer: Concrete block, originally uninsulated.
- Insulation: 2.5-inch InSoFast EPS panels with built-in stud strips.
- Lower half: AdvanTech subfloor panels. They aren’t required, but I wanted the durability and impact protection.
- Planned finish: ½-inch drywall, which will also serve as the required fire-protective covering over the foam.4
Because of the AdvanTech, there will be a ¾-inch step between the upper and lower drywall. To fix this, we’ll add a horizontal trim board as a transition, like a chair rail or wainscoting. Bonus: I plan to use the trim to mark where the InSoFast stud strips are, so anyone who wants to hang a picture later will know exactly where to find them. Call it practical design.
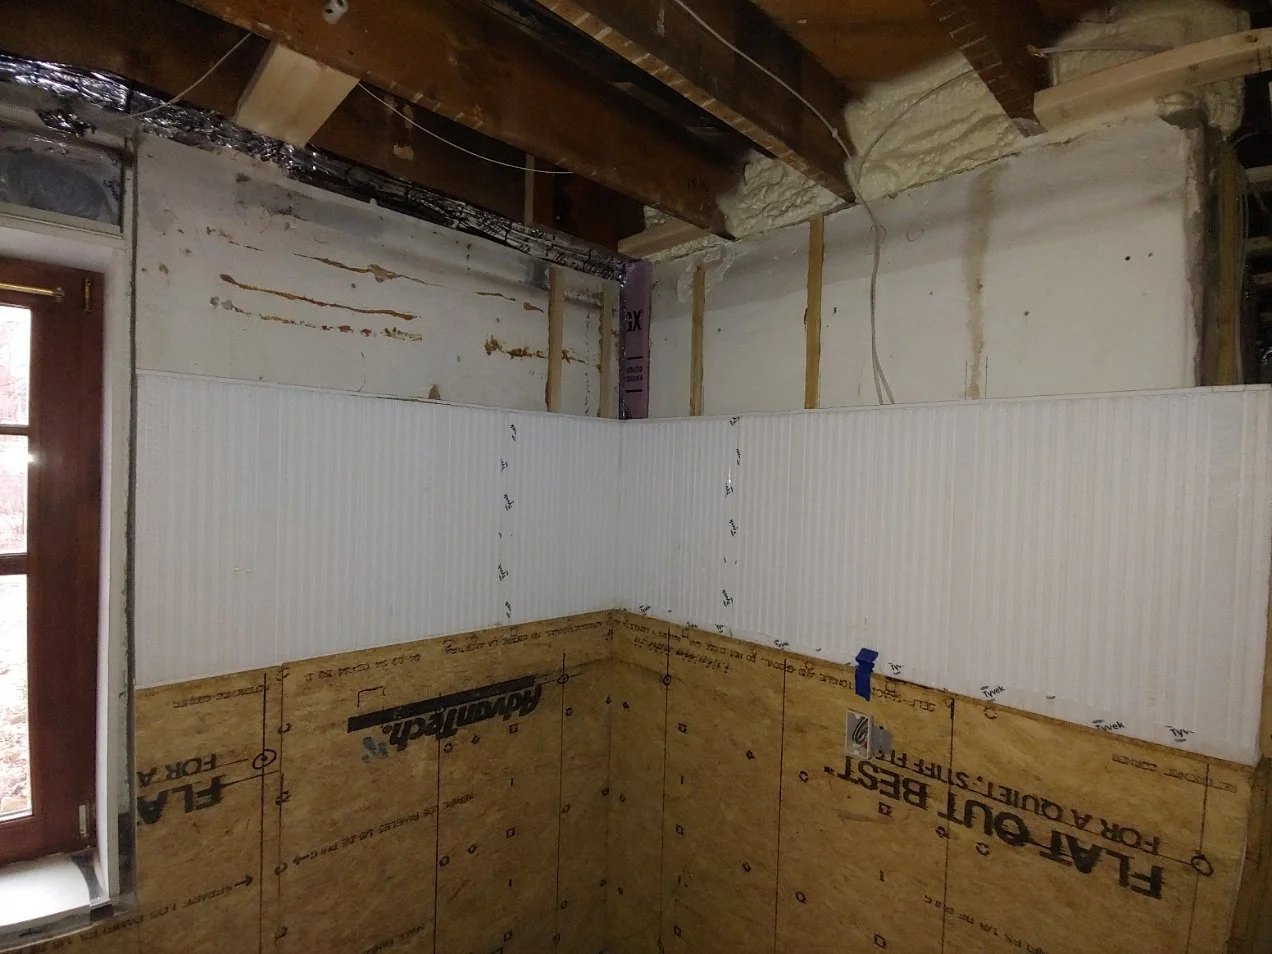
Continuous insulation: it’s a beautiful thing in a basement.
Moisture, however, is not.
In Minnesota, when it hits sixteen below, the basement walls are going to get cold. That’s not hypothetical, it’s reality. Insulating on the inside actually makes the block colder, which is why the insulation has to do more than insulate. It has to keep warm indoor air off that cold concrete, and the wall still needs a way to dry.3
There are really two moisture problems. One is water coming through or around the foundation. The other is humidity from inside the house: laundry, showers, maybe someday cooking. InSoFast panels have drainage channels on the back, which help with the first problem as long as the water has somewhere to go. They don’t do anything about the second.
I still think the best defense is a good offense. So we’re being careful with the sealing, checking the foundation’s water history, and adding an ENERGY STAR dehumidifier for indoor humidity, along with an energy recovery ventilator (ERV) for fresh air. They do different jobs, and neither one replaces good water management outside.
What the Minnesota code exception meant for my project
I pulled a permit and talked through the approach with the inspector. One provision that applied was Minnesota Rules 1322.0100, subpart 3.A, exception 9. It exempts certain R-value, air-barrier, and vapor-retarder requirements for permitted alterations to existing foundations when the original house permit dates from before June 1, 2009. Ours qualifies.5
The inspector’s verbal go-ahead concerned my permit and proposed assembly; required inspections still apply. If you’re doing your own basement, have that conversation for your own house.
How the walls fit the bigger picture
The basement walls are one part of a larger retrofit that includes the floor, heating, wiring, air sealing, and insulation elsewhere in the house. When I first modeled the house, it had an unofficial Home Energy Score of 1 out of 10. The latest round of upgrades has moved us far ahead.
Historical whole-home estimates
These were unofficial planning scenarios, not measured results or an official DOE Home Energy Score.
| Scenario | Unofficial score | Annual cost | Annual energy million Btu |
|---|---|---|---|
| Before retrofit | 1/10 | $3,037 | 253 |
| Basic upgrades | 3/10 | $2,847 | 226 |
| Intermediate upgrades | 7/10 | $2,226 | 162 |
| Deeper retrofit (modeled future) | 9/10 | $2,302 | 137 |
What I’d tell another homeowner
- Know your water history. Fix leaks and drainage problems before you close up a wall.
- Plan the connections. Floor, rim joists, corners, windows, wiring, and penetrations all belong in the scope.
- Follow the actual product instructions. Sealing, attachment, and fire protection should match the system you’re using.
- Take pictures before the drywall goes up. Keep the photos, product sheets, permits, and invoices.
For me, the real turning point was seeing the floor, walls, and systems start to fit together. A good basement retrofit depends on that coordination as much as on the panel itself.
Planning work on your own home?
Start by collecting the facts: your existing insulation, foundation condition, equipment, photos, and open questions. Green Home Predictor can help turn those into a plan and better contractor conversations.
Collect your home facts →Sources
- NREL, Residential Energy Efficiency Potential: Minnesota, November 2017, p. 1.
- InSoFast basement panel information and technical data sheet. The product page lists R-10.5 for EXi-2.5, and the data sheet lists R-10.6.
- Building Science Corporation, Info-511: Basement Insulation.
- InSoFast Interior Installation Guide, pp. 4–5 (sealing) and p. 7 (drywall and fire protection).
- Minnesota Rules 1322.0100, subp. 3.A, exception 9.
Project photos: John Horchner / Green Home Club. This is one homeowner’s project, not a design for every basement.
